Battle Scars – the JR1 returns

Finally, the JR-1 (the James Ready signature model) has returned for its proper service.

img_20180407_1529161.jpg

It came in briefly once before to repair a slightly raised fret, but not for its full setup post delivery. It’s been on the road about three and a half years now I think, and been featured very heavily on Walkway III as the main rhythm guitar – especially on anything drop D tuned.

It’s had an unbelievably hard life already, which was one of the reasons I originally wanted to work with James. Walkway is a proving ground for my building method, in that if it can survive that kind of heavy gigging then I’ve got it right.

The main issue was that James was reporting a little buzzing from the top E. I hit the strings fairly hard and it was rattling a bit, so I lifted the strings very slightly and the problem disappeared. The truss rod was just about right though, so I just unwound it about 1/4 turn, then slowly put the pressure back on a touch to add a little more clearance. That seemed to clear any buzz but the action was not noticeably higher.

Then it’s time to look at the bridge.

IMG_20180407_111408[1]

The pickup and the bridge are carrying a fair amount of corrosion. Now destrung, its time to see what moves. The posts on the bridge are held tight with grub screws. I can’t adjust the height at the Bass end (though I’d already moved the treble end slightly) because the screws are rusted solid. In fact I can’t even get an allen key into one of them, so badly has the rot set in.

So I freed it up with a little heat and oil, then took the bridge off its posts to clean it up and try to stop the corrosion in its tracks. You can see how bad it is below.

Some of the rollers are seized, which rather defeats the object of the exercise to reduce breaking against bending. Although there aren’t any sharp edges, they have to be freed up.

The best way is just to soak them in oil, to dissolve any crud and hopefully soften any surface rust.

Everything that will come out goes in the oil bath. The saddles come off, but the grub screws were tight so I left them in initially for an hour, returning to them to unscrew them when the oil had done its job.

IMG_20180407_134326[1]

After a couple of hours while I was working on something else, I came back to a much better situation. Putting the bridge back together, the screws went back in with almost no resistance at all which was rather more reassuring.

Of course, getting all the surface oil off was a bit of a task, but the best way is to leave a film on anything the hand doesn’t touch, which will repel at least some moisture for a while. There’s no harm in putting a little Vaseline into screw threads on a guitar, just to keep the rust away, when restringing – especially if you’re one of those players who rots guitars for fun every weekend.

IMG_20180407_111339[1].jpg

Next is to have a good clean up. You can see what looks like glitter on the headstock – that’s shredded string and metal pick from the last few gigs. There was lots of it all over the guitar. Then it was taped up and the frets polished. There’s a bit of wear, but nothing too serious and there’s no point in a dress at this point.

Considering the use it gets, the frets have held up fairly well – and possibly in some way aided by the use of elixirs because the string doesn’t become more abrasive on its underside through corrosion.

And so then it’s time to put it back together and set it up. With the bridge now working properly, it’s a piece of cake. Really, apart from the bridge the guitar has survived almost intact, and that will last a few more years before it needs replacing. The electronics are fine, and sounding great. The Bare Knuckles in this one are the VHII pair – bright and spanky, and apart from the Mules my favourite to fit.

The paintwork however….well that’s another story!


Hand Building a Strat – Pt.1

I’m back in the workshop this week (in fits and starts as per usual between repairs), to start on a new build. The purpose of this one is to build a 1960’s type Stratocaster – basically a ’61 in terms of how the guitar feels and sounds, but with some refinements of the modern age which will make it a touch easier to deal with in service terms.

So starting with the neck, a rosewood boarded 21 fret bolt on with a figured maple back, I thought I’d break down the process to show you what goes into a totally hand built guitar.

Preparing the blank

First thing is to create a ‘reference’ plane on a thicknessed maple board.

IMG_20180313_114552.jpg

I use a planer thicknesser for the first part of the operation (the board was fairly flat to start with) so there wasn’t any major problem with the board being flexed by the rollers.

The board started at a depth of about 1″ – but the thickness required for the project is only about 0.8″.

I put the board through the machine both faces up at any depth, and only take about 1/32″ at a time as I get close to the required depth.


Now we have a flat thicknessed board, the plane is sharpened on my Japanese waterstones to a fine edge and polished, ready to create the reference edge. This is always done with my trusty No.5 Bailey Plane, the old fashioned way. It’s just a case of planing the edge totally flat and straight so it will take a router guide without deflection, and this edge is going to support the square for marking the blank.

Marking the Neck

At this point you have to decide how you want the figure in the wood to appear on the finished neck. that will tell you which way the neck will face on the blank, and which side of the blank will be the back. Having made that decision, I mark the centre line of the neck using the square from the reference plane and mark it on the wood.

Then I use the template to mark the shape and the nut position against the centre line.

img_20180313_115922.jpg

The next job is to lay the truss rod into the neck. For this neck I am using a spoke wheel truss rod, so that it can be adjusted from the body end without removing the neck from the body. For me, this is the best design of truss rod. Also, it’s a biflex rod so the object of the exercise is to make sure the rod sits in the channel with the flat bar absolutely level with the surrounding wood – it will be in contact with the fretboard. The truss rod however, isn’t a constant depth. So the depths will be cut in sections.

IMG_20180313_121244.jpg

A router is not designed to remove large amounts of wood, its designed to make a smooth edge into a recess. So the best way to cut the channel is to remove as much material as possible from channel before using the router. So a drill is used to hole the channel to a set depth (in this case about 8mm with a 6mm brad point drill bit. I’m using the press drill with a depth gauge to make this simple.

IMG_20180323_104159.jpg

Then it’s just a case of straightening out the channel with the router. I’ve got my router set up with a long fence, that I’ve stuck to it ‘Valerie Singleton’ style with double sided Sticky tape.

Then each area of the rod can be checked for depth with the router depth guide, and the reference plane used to make a straight route down the neck blank. At the points where the rod is deeper and wider than the 1/4″, then a wider router blade is used, and the depth set appropriately. The end doesn’t have to be tight as its just the spoke wheel adjustment. It’s only important to have the moving flex of the rod tight to the fretboard underside to prevent a rattling fretboard.

To fit the truss rod into the channel to check the depth, in this case the end of the neck needs to be sawn to shape, taking the edge up to the heel. that way the spoke wheel will lay totally free at the end of the neck (there’s no fretboard overhang).

The Fretboard

The rosewood fretboard blank has to go through the thicknesser in the same way as the neck blank. This time the blank is thinned to about 8mm. That’s just a bit deeper than we really need, but allows for the work to leave indents on the front of the fretboard without being permanent damage, as a good layer will be removed as we shape the fretboard.

Then it’s marked with a pencil, a centre line (so we can line it up with the centre line of the blank back) and then the shape from the same template. Remembering that there’s going to be a good 3/4″ left over at the end of the nut before the taper into the headstock, the blank is cut on the bandsaw down to the rough shape.

A word about routers…

I had a metal based router table, I used it occasionally for cutting out fretboards against a template.  I didn’t like it, it all felt too light, so I built a heavy wooden router table and spent a lot of money on a 1/2″ router and an imported lifter platform insert to fit it to.

I almost never use it.

The problem for me is that the blade is upright and exposed. Now I know I don’t really need to put my fingers anywhere near it, but I’ve developed a real dislike for it (bordering on paranoia). Also, in the UK I find it impossible to find a decent sharpening service, so router blades are almost never sharp unless they’re brand new – causing me to have lost a few blanks to ‘grabbing’ and even scorching. So I don’t use it unless I absolutely have no choice.

To clean up the fretboard edges from the bandsaw, I go to my small Stanley plane. It’s a low angle ‘block’ plane and was a gift from an old friend when I first started out. And then I just take the edges by eye until they meet the pencil marks. Old fashioned and simple – and what’s more, it takes me less time than setting the router and taping it to a template.

IMG_20180323_120708.jpg

The fretboard has to be slotted. I use the Stewmac slotting jig to mark it. More double sided sticky tape, and the trick with the 25.5″ template is that when you put the blank on the steel plate the nut line should sit at the ‘cut off’ line to make the blank sit correctly. I mark these lines on the steel plate. I also mark a centre line on the plate to line the blank up square (no point in having slanted frets!)

The saw lines aren’t deep, I’m just marking it at this point. Once I’ve got the neck glued together I start cutting them to depth. At this point it’s just being done because the whole neck won’t go in the jig so easily.

The end of the fretboard needs to be shaped to match the template, I do this with a file. Normally this doesn’t have to be done until the neck is glued, but this one had the spoke wheel hanging out of the heel, so once that’s in the heel can’t really be touched.

IMG_20180323_125844.jpg

Now it’s time to glue up – with the truss rod in place…

Gluing up

There’s a trick to this, which I’m going to divulge….and it makes it very easy.

IMG_20180323_130920.jpg

I put staples in the blank, then I use my fret tang cutters to cut them off with only a tiny bit of the leg left showing out of the wood. I then take the blank and line it up with the blank, and force it down on the spikes. This means that under pressure the fretboard can’t move (and the glue will make it slippery).

Usually, I would use a hide glue for this, but in this case I’m going to use a locally sourced white glue. There’s three reasons for this. Firstly, it’s a bit cold and the hide glue will probably go off too quick as it cools. Secondly, it’s a bolt on neck and therefore if something goes wrong with the truss rod it will be cheaper to throw the neck away and build another one than try to repair it – the point of hide glue is that its easy to steam open. Thirdly (and most unusually), I’ve been asked to make a guitar by a vegan, to vegan rules (i.e. absolutely no animal products). So I’m using this to test the glue I’ve chosen to use for that job as that one is going to be a set neck and therefore a total pain if the glue fails!

The truss rod is sealed in plastic, so it’s not a problem if a little glue gets on the sheath, so on goes the glue and it’s time to clamp up. The fretboard drops back onto the holes that the staples have made in it, so I don’t have to hold it while I clamp it, and I can also push it down by hand and just clean away some of the excess glue, before obscuring the work with clamps.

I’m using a flat wooden caul on the top to even the pressure out, and I’m using a lot of pressure from the clamps. Also, I’m clamping it not just to itself, but to a very flat work surface (made from kitchen top) which is very stiff. This means that I can’t bend the work and end up with a slightly twisted or bent blank because the clamping surface has distorted.

And there it is, the first day of work on the neck. It’s going to dry overnight. As soon as I can, I’ll start work on the body.

Until next time…

Repairing a Ship in a Bottle

Last Friday night, my friend Simon brought his Epiphone 335 over to the house for a bit of TLC. It had a buzz, he couldn’t figure out what was causing it and had become a bit frustrated with it.

It stems back to the fact that the original pickups that were fitted to it had been a little uninspiring and he’d acquired a set of fairly modern SG pickups that he’d had a shop wire in for him.

Unfortunately, the soldering job looked a bit like this:

IMG_20180313_075407

These aren’t the actual pots but two I pulled from another Gibson that had been butchered with a soldering iron some time ago. I wish I’d have taken pictures on Friday, but I just didn’t think of it at the time!

Wires were twisted together into masses of unspecified solder joints, the solder was almost melted to itself, but the contact with the Pot body was poor, contacts were badly twisted and none of the wires were through the contact holes or had any real mechanical grip. More than one joint fell off just by removing the pot from the hole! It was a mixture of far eastern promise and local desperation!

My initial assessment was that the mess needed cleaning up and the joints remade. But that’s easier said than done on a 335. This is the ‘Ship in a bottle’ bit.

335 rewiring
Here’s a link to Music radar’s guide on changing 335 wiring, if you’re feeling brave! https://www.musicradar.com/tuition/guitars/how-to-change-the-pickups-on-a-gibson-es-335-style-guitar-364062


So at the outset, I made an important error. I know a lot of people (even in the guitar business) aren’t very good with soldering irons. But I assumed that the installer had put the wires in the right place. And to be fair, the pickups did ‘work’ – in that they made a sound which seemed fairly consistent with humbuckers in a 335.

I tested that the earths were consistent with a meter – no resistances that you wouldn’t expect. The covers had been removed from the pickups, and this is where I got that Friday brain fade and didn’t notice the obvious mistake.

So we rewired a lot of it, cleaned up the joints and put it all back together. And still it hummed. So, having run out of time on Friday evening I sent Simon away with it with the proviso that I’d have another look when I had parts in stock to do a proper rewire if it were required.

Pickup Wiring Guides.

As an installer, I see a lot of different pickups. The wiring for them isn’t universal. Original Gibson pickups only had one wire – a positive that was straight to the pot and the shield which was connected to the ground side of the pickup and was tacked to the pot body. Modern Gibsons often have two conductors plus the shield. The colours are green and black. Seymours and Dimarzios are almost opposite to each other in terms of colour coding, especially with 4 conductor units. Every time I install a pickup I look up the pickup wiring guide online if I don’t have the original paperwork.

Having had a rethink over the weekend I asked Simon to bring it back last night – I had a feeling that the shields on the pickup wires were the problem, acting as an antenna. They weren’t independently earthed, so I was going to earth them separately -and that’s when I noticed the mistake:

Green is NOT live on a Gibson Pickup (at least not these ones) – black is. The original installer had wired the pickups in backwards, making the shield of the pickup wire part of the signal path. I quickly checked my hypothosis by taking a piece of loose wire from the bridge to the chassis of the pickup – which removed all signal from the guitar to silence. We swapped the wires around and suddenly the noise was gone.

The take away:

Never assume anything. It was late Friday, I was a bit knackered, and I missed something incredibly obvious. Always check the wiring colours!!!

The Ship in a Bottle

The real trick with 335s and other similar guitars, is to have the entire wiring out on the top of the body to work on it. Getting it back in is then a choice between two methods. One is to use soft and over length wires to give you lots of room to manoeuvre it in – using plastic tubes through the holes in the guitar and back onto the spindles of the pots to draw it all back. The jack socket needs a plug in it that will go through the hole (usually by removing the case from the plug) to draw it back.

The other method is to wire the pots on a cardboard caddy that replicates the shape of the holes in the body with fairly stiff earth wire (and possibly the capacitor)  running forwards from Tone to Vol on both sides. This way if your hand is small enough you can put the vol in near the hole, and that will guide the tone to the right spot. Use a soft wire to join the two tones together and to the socket, nicely long so that you can remove one side at a time.

Lastly: Solder

Old farts like me will always have some old solder lying around for restoring older guitars. This stuff isn’t so readily available any more because of its lead content, and its not used on production items any more.

We’re allowed to use it (and actually to obtain it for repair work). It flows better and at lower temperatures than modern solder. You’ll find that working on a modern guitar requires a lot of heat when trying to unsolder a ‘big blob’ of earth where everything has been twisted together onto the back of a pot for quickness. It can make a quite a mess. For any tricky job I’ll use the old stuff to reduce the heat necessary.

Using a solder station with a temperature control can help, especially with lead free solder. But also, its really important when making the joint to make sure the solder ‘flows’ and not just sticks. Because the stuff requires so much heat now, I see a lot of joints that aren’t really well made. Be patient, you’ll see it flow when there’s enough heat. The wire will get very hot, so hold it with pliers where you can.

Always remove all the solder from a pot leg, using a solder sucker (they’re cheap enough), and make sure the wires go through the hole. This way you can use less solder to make your joint and it will flow more easily. Plus it then has a mechanical strength – important when you’re wrestling it back through the F- Hole of a 335!

Happy Ship building!


Operation Watertight! TE Guitars is open for business!!

At the end of the year, I wrote that the workshop would be closing for a while for some remodelling to try to remove some persistent issues. So in early January I started the process of removing much of the tooling and woodstock so I could start to address the underlying weaknesses in the workshop.

Rats!

I purchased a month of storage on January 4th – a shipping container, and filled it with much of the tooling over the following few days. I’d had Andy the pest controller in for a couple of months already, trying to clear the rats in the roof. But the bottoms of the wooden inner walls were wet so I decided to remove the bottom few inches to stop the wood drawing the water.

That’s when I found how bad the rat problem actually was.

IMG_20180105_113848[1]

This was what I found when I pulled out the metal work bench – the rats had got into the walls and were nesting with the insulation. No wonder I could smell them. As I started to pull away the bottom few inches, it was clear how much of the insulation had been torn up by the invaders. IMG_20180109_144533[1]

So the first priority had to be to clear the invasion – and before long the traps were full and the bait well decimated.

I got a tip from a friend – rats don’t like wire wool. They won’t chew it I’m told. So up on the roof to find the holes under the corrugated sheets that they were using. These were wedged full of heavy wire wool, and then held in place by surrounding it with expanding foam.

IMG_20180111_111530[1]

It’s a mess, but hopefully they won’t eat it!

Water

Next job was to dry the workshop out and find a way to keep the floor dry. I decided to create a bund with path edging. To add to that, I cemented up the gaps in the frame that holds up the doors.

IMG_20180112_135751[1]

And then I had to wait. But not for long – the rain came, and came hard in a day or two. Soon a pool of water appeared in the corner of the workshop. But having felt behind the stones, the cement laid behind was dry.

So I searched around for the source of the water, and very soon I found that the water was dripping in through a gap the roof insulation. The roof had cracked, about 15″ across one sheet of the corrugated between the screw holes. So up on the roof I went, with some sealing paint. Finally, it started to dry out.

Bringing back the tools

It took three days in my car to bring everything back from storage – but four days ahead of schedule all the equipment was back in the workshop. It took another day or so to reorganise everything to the new layout and create some storage for tools that were in cabinets that are now being recycled.

This morning, the last tools were put back on the shelves, and the main part of the workshop is ready to go. Tony Edwards Guitars is back in business!!

IMG_20180131_113638[1]

There’s more space, less clutter – and no water! OK, there’s no spray booth yet – I’m still rebuilding the extraction system as that was pretty soaked and the wiring had been chewed. But pretty much anything else, I can do!

Thanks for your patience – I know customers have been waiting to bring in repairs. Bring them all in now, I can’t wait to get started again.


2017 In Review at the Workshop – Annus Horribilis!

IMG_20171228_094846

So at the end of 2017 the workshop looks like this. Finally, after a year of persistent damp and minor leaking, it has succumbed to the deluge that has arrived between Christmas and New year.

IMG_20171228_094829

That’s the opposite corner. There’s no light in the spray booth – I may have to rewire that but I’ve pulled the power on it for now due a slightly different issue. But that’s flooded too – in fact the water you see here has actually run into the main workshop from the spray booth.

The damage isn’t particularly bad. I had struck first by earlier in the winter wrapping stored equipment in polythene sheets and raising anything I could off the floor. But the new year will not be seeing a quick return to guitar building, for obvious reasons.

Furry Friends

Unfortunately, the second issue has become as pressing as the first – the wet weather has driven a colony of Rats up away from the River Wensum valley and into the workshop. Mainly, rats requite food and shelter. Its very easy to find food for a rat in any urban environment, but shelter is more difficult. Unfortunately my workshop has a false ceiling, so they nested in there and started breeding. Before long I had a serious infestation – the smell was appalling. Fortunately, I found a really good pest control agent in Acorn, who got to work on it really quickly and we got most of them before they did too much damage, but I will have to check the wiring in spray booth as that area has clearly been chewed!

So what next?

Firstly – I’m not going to close! But there’s no point in me taking on new build guitars for the next few months because I just can’t keep the workshop dry enough to prevent warping of wood and other issues. Not only that, to remedy the problem properly I’m going to have to gut the workshop, probably to storage, and start again.

My plan is to build an internal bunded floor, raised up so that any water cannot run into the main part of the workshop. My belief is that its running down the slope outside, and under the walls. If I strip back the walls to the concrete and lay a raised floor, then put a layer of bricks around the inside of that, then I can hopefully keep the water off the floor.

Then I’ll have to re insulate and rewire the entire workshop. That took me three months in fairly dry weather when I originally did it – I expect that it will take around the same again.

In the meantime

Firstly, just because the main workshop is closed – the electrical, setup, small customisation and repair work hasn’t stopped. In fact, space has been made now to increase this work in the new year.

Secondly, more hours have been freed up for new students to enrol in the new year, in both Guitar/Bass tuition and Kit Drums.

As I start ripping the workshop to pieces, both Musical and Woodworking gear will become available – as I will be reducing the machine tooling in the workshop and moving further towards purely hand tool production and more totally one off designs. The new workshop, when it opens, will attempt to be more bold in terms of design and materials. But it will be more traditional in terms of production, which will ensure a real ‘one off feel’ to everything I make.

2017

It hasn’t been all bad!

Lots of customers have been through the workshop this year. Some interesting guitars have gone out. I think my favourite has been the Viola guitar, which was an experiment in using locally sourced materials and lower cost parts to create a more affordable handmade instrument.


IMG_20170524_150806

I’d like to take this opportunity to thank all the customers who have been through the workshop this year, all the students and those who have helped spread the word about the work I do here on social media and to friends.

I’ve been in the guitar teaching and building business on and off since the early 1990’s. the first full time workshop opened in Hunstanton in 2005 for customisations, parts building and repairs, and for full builds from 2009. This has been by far my hardest trading year, but at the end of it I’m still standing, and I don’t plan on going away any time soon!

Thanks for all your support – next year will be a big year of rebuilding and redeveloping the workshop. But I’m looking forward to it with renewed purpose.

Have a great new year.

Tony

What’s going wrong with Gibson (and Fender), and more….

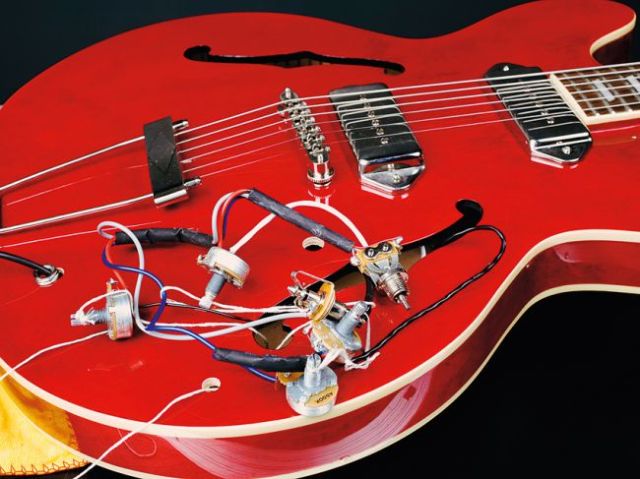
I blogged about the 2015 Gibson offering and their crazy ‘Robot tuners’ some time ago. I argued that the CEO Henry Juszkiewicz had taken a massive wrong turn with current designs and that their U turn had been an inevitable outcome of that.

But the real truth is that Gibson (and possibly to a smaller degree Fender) appear to be in serious trouble, and in part this is a product of their own making.

Gibson and Consumer Electronics – Diversification in a shrinking market:

Back in 2014, Gibson acquired Phillips consumer electronics arm (the strangely named ‘Woox Innovations’) for around $140 Million. Gibson’s intent was to move from being a guitar company to being a ‘Global Leader In Music & Sound’. It had already bought other electronics industries such as Teac, and owned Cakewalk/Sonar.

I was alerted by a news story that popped up yesterday again, that Cakewalk was to be shuttered, all development of the Sonar platform was to cease, to have a wider look at the Gibson situation and the underlying issues with not just them, but the music biz in general.

Leveraged growth

Do you remember the story of Tower records? It went stellar in the late 70’s, expanded way too rapidly into the 1990’s, and then found that there was no real way of paying back the money it had used to expand? It collapsed under a ton of debt and red lines.

Gibson is facing similar issues. In the mid 80’s, it was dying in the hands of the Norlin Corporation who seemed to know about as much about making guitars as I know about nuclear physics. HJ led the takeover and by the mid 90’s had not only turned the company around, but had it making the best guitars it had made since it had fallen out with Les Paul in the 1960’s. (I have a ’96 – its a great guitar- my main squeeze until I started building).

Gibson saw the reduction in guitar sales as a cue to diversify. Electric guitar sales have been on a steady decline for years, in the USA down by about a third over the last decade. There are multiple reasons for this, but I’ll return to those later. So the desire to diversify doesn’t on the face of it seem so strange. But its how they achieved this that has run them into trouble, in that they had to leverage their acquisitions quite heavily.

Early this year, they had to restructure a part of their debt. That amounted to taking on about $185M of new liabilities, but created liquidity for the company to be able to get on with the day to day business, rolling over in the process about $100M of looming repayments.

Moody’s just downgraded Gibson Bonds – (a debt creation tool, where the company takes money for a promissory note to pay the bond back with interest at a fixed date) – to Caa1. This is Junk status, actually way deep in junk status. Gibson notes (which pay their interest regularly like any other bond but don’t return their capital until the due date) are trading at well less than their face value – last I saw about 59c on the $. That suggests that investors are willing to lose some now to avoid losing more later, if Gibson defaults. The ‘market’ rates that at about a 40% chance. There’s some good research on the numbers by Eric Garland here.

Then according to reports there’s another load of debt due in August 2018 – Eric thinks about $375m, but other reports say more like $500m plus. Whichever is correct,we’re talking telephone numbers.

Inside the Corporation

So why are Gibson still haemorrhaging cash and losing market share, and why hasn’t diversification helped them? One reason is that they haven’t bought wisely, and their acquisitions aren’t fast growing enough or cash producing to cover the debt that they incurred. And that also their businesses aren’t very joined up. Too much, too quickly.

But another reason must be the culture at Gibson, which is an issue that would by all reports seem to start with HJ himself.

The CEO appoints all staff, personally. He micromanages at every level of the company. At the same time he has made some quite unusual decisions. (Who can forget the Firebird X model, or the dayglo Les Paul?) The 2015 Les Paul Standard range was a response to a number of production issues that had began to creep in – fret edges grabbing strings into the binding, poor tuning, etc. Rather than working this as a quality control issue, the decision was made to widen the necks and add a brass nut to replace the poorly cut Corian.

Then there’s the output itself. The credit ratings agencies have said that one issue with Gibson is that they have too few product lines, and that the product lines are decreasing. However, this is the opposite of what the customer is saying. What they want is good historic standard guitars, at a price that the working musician can afford. Evolution, not revolution. Gibson, for all its faults, is being puled in two directions by competing interests – guitarists and fund managers.

So they have closed Cakewalk – I assume that they thought this quick end would be less expensive than trying to sustain it while it was sold, and they might be right as DAW is a crowded market. But they are making other changes. The Crimson Custom shop has been quietly closed too, for how long it is not clear. The founder of the Custom Shop line apparently has moved on. The Nashville factory is up for sale, with Gibson planning to move out of there after a time to new facility in Nashville that they also don’t plan to own.

There’s a website that rates companies from a workers perspective – Glassdoor. I signed up so that I could have a look at what the staff thought of it. I have never seen a worse public profile for a business in a high spec production environment in the West! It’s employees seem to hate it, and they don’t seem to stay long. In fact, the culture is reportedly so toxic that managers seem not to last long at all, creating a disjointed feedback system to the top of the issues in production and quality.

Hours are long, relations with management poor, benefits pretty low and pay not much better for the level of skill involved. Output figures chased with relentless pressure, supervisors constantly moved about, a loss of personality. The shop floor workers report a great degree of solidarity with each other, but none with those above them.

Gibson, like Norlin before it, would appear to have become a numbers game, not a quality one, if the reports are to believed. Higher and higher output with less and less regard for the quality of the items delivered seem to be the antidote to rising debt. Now of course, reports from the shop floor like this, anonymised, should be treated with caution. But there are hundreds of them, and clearly there are some pumped responses that are so transparently management trying to alter the stats that it’s almost laughable.

Henry is just not listening, and nobody seems powerful enough to question his wisdom.

Out on the Street

Out on the street, something is happening in the music industry. The independent retailer is disappearing. And the ones that are there often don’t stock Fender and Gibson from the factory. Second hand, yes. But not new.

The Music industry is being distorted by venture capital. Mergers and Acquisitions are a way of creating economies of scale and rapid expansion, but they are having another effect. As FMIC and Gibson have grown in size bringing in many of the previously independent manufacturers, they have also changed their sale model into the retailer. They no longer use distribution companies. Those companies gave the independent retailer an opportunity to stock the big brands, because they also had accounts with them for consumables – strings, sticks, heads, spares, accessories, and some of the less exclusive brands. Gibson used Rosetti, Fender for years traded in the UK via Arbiter.

But when they cut out the middle man, they also cut away the independents. They raised capital investment and minimum inventory holds for the stores. Then when they made disastrous product changes they discounted heavily through online retailers to shift unwanted stock, leaving many independents with massive losses to bear on unsellable items – items which they had forced them to stock against their better judgement in the first place. Many of those that survived the 2008 crash and the collapse in demand, simply walked away from Fender and Gibson (and the brands they also own).

That restricted the visibility of the big brands to the big chain stores, but also their feeder brands like Squier and Epiphone. But not all of those big boys have fared well in the past few years either. They bought into huge numbers of brick and internet platforms. Competition became fierce and margins fell, taking Soundcontrol with it in the UK. In the USA, Guitar Center teeters on the brink, massively leveraged and a mere showroom for the low end Internet sellers that the Guitar companies are now supplying (including Amazon!)  When you walk into these stores now, where once they were alive with the sound of guitarists trying out new gear, now largely there are three or four guys behind the counter, outnumbering the customers 2-1. Piped music plays in the background.

To keep visibility and find new sales, both Gibson and Fender have ventured online at prices which undercut their own dealers, especially the independent ones, causing even more to walk away from the brands. But would you drop £2500 for a guitar online? I wouldn’t. It’s a risk.

Culture wars

In the UK and the USA the culture has shifted significantly in music as in many other areas in the last 20 years. Yes the X Factor type TV shows have caused some of it. But some of it comes from the immediate nature of life itself in the technology age. Kids can gain instant gratification from Computer games and other technology. Learning to play is becoming less popular. It’s slow, can be difficult, and requires patience. And those who do learn in the school system are often squeezed into the ‘Rockschool’ system which if misused can stifle individuality and therefore the desire to continue into adulthood.

But there is another significant issue; who is the next guitar hero that will ignite a million fingers? In the last ten years, that guitar hero has been…….Taylor Swift.

Yes really!

Back in 2004/5 when I returned to full time music after 12 years out in industry, it was Billy Joe Armstrong. But at the end of the day, neither of them are ‘great players’ in the vein of Hendrix, Van Halen, Clapton, Vai, or even the early players like Charlie Christian, Jango, B.B. King or Scotty Moore. You might learn to play based on the modern guitar heroes, but you’ll never really open up the possibilities of guitar playing Punk or Pop. The only players pushing the envelope are in the fringes of prog, jazz and metal, which get no airtime.

That is the real reason why the electric guitar market is shrinking and the only growth market is in Ukelele and budget acoustic instruments. The majority of kids get where they want to go fairly quickly, or get bored and drift away. And because their target is quite low, there’s less chance of them playing into adulthood because the satisfaction is also lower. Fender are reportedly trying to combat that by creating online courses that come with their guitars in the USA. The realisation that they won’t sell their top end products to a new generation unless they can nurture them and keep them in the game for a number of years has become apparent to them. You won’t buy an expensive guitar where a cheap one will do, and only when you have matured as a player will you pay out for a ‘Made in the USA’ premium instrument.

Meanwhile, my custom build customers over the last two years have all been in their 50’s or above. Many of my repair customers are the same. Younger students seem less abundant, the desire is less than it was ten years ago, and they buy and sell cheap guitars but never invest in that lifelong instrument. Always tinkering, but never settling. The high end customer base is ageing fast. And they already have their ‘lifetime Guitar’ in most cases.

If there’s any growth in the electric guitar industry, it’s in the heavy drop tuned 7 and 8 string market. But these aren’t really premium instruments in many cases just as the 80’s spank planks I played in my youth often weren’t, and they aren’t something that either Fender or Gibson do much trade in. that is in the mid priced pointy end of the far Eastern Market, and its doing fairly well by all accounts. And when my younger students come in and ask to to learn a specific song now – the chances are it will be Offspring, Blink 182, or something far heavier that I’ve never heard of. If not that, its an acoustic song in a non standard tuning. Mainstream music is not guitar driven any more. The next Ace Frehley is not just around the corner.

So where does the industry go from here?

In Gibson’s case, unless it can restructure its debt next year there is a possibility that it will be broken up. The most valuable part will be its intellectual property in the Brand itself, and the historic models that encompasses. There’s a lot to work with for the right investor, just as there was when Norlin finally gave it up in the 80’s. But they will have to understand that the market is unlikely to grow significantly now, and that they must offer better value.

Fender seem in much better health, but they still face the same issues on a much smaller scale. Their current modern series of American Standards have not set the world alight. and this after in a similar time to Gibson having come back from the brink when they rose from the CBS era. But they have a wider portfolio into budget instruments, and a more solid one. If Gibson production were to end in the USA though, Fender would surely look at that and have to make a decision as to whether they would need to compete on the ‘made in USA’ badge. Mexico would invite an uplift in production I suspect.

Even PRS have apparently reduced production at the top end, and increased the Korean range. At the same time, in the UK they supplied new standard model instruments to retail to a company that is essentially a Pawn Broker. I nearly fell out of my boots when I saw that a few years ago.

But the real lifesaver for the guitar industry will be a new hero to come along and ignite the imagination. And every guitar maker, large or small, will hope that it’s their guitar around that hero’s neck.

In the end, that’s what we do – We’re in the imagination business


Back to Building…

It’s been a long while since I started a new build – late last year I think. I’ve been working on other things – playing partly, making furniture, but mostly my rather long neglected Victorian house. We’ve been here two years and we’re now really getting into the restoration.

But in an attempt to separate youngest from the bloody playstation (by choice rather than by force), I’ve been encouraging his sudden enthusiasm for playing the bass. Now this isn’t the first time this has happened in the family – his eldest brother also took a shine to the bass in an attempt to boost his grade at GCSE music – and his bass now sits in my studio largely unused. But we continue undaunted.

Smallest boy is clearly being fed the wrong diet, because at 12 years old he just can’t reach the business end of his brother’s P bass. But he likes the shape, so we went to look for a bass for him in Norwich.

Well to say that the choice in short and medium scale basses is pretty poor would be an understatement. The three quarter bass in one shop was little more than a toy, and a good way to waste £100. For about £140 you can buy a kind of ‘no name’ Fender/Ibanez clone with a loose tuner and a neck like a boomerang. It would appear that apart from Hofner, nobody really takes the Short scale, particularly seriously. Of course there’s always and exception to the rule, and that’s the Epiphone EB-0 or 3. But I don’t buy guitars unseen, nobody stocks them, and they aren’t a sound that’s adaptable to every style.

So we designed something around the 51 P bass shape, but only 32″ in scale, and with the curve in the lower body just a little further forward, to bring the bass across the body a little when seated with it.

IMG_20170818_175422[1]

The body has been made from a piece of Tulip that I had in stock since last year, joined just below the level of the neck pocket. The body is a couple of inches shorter than a P.

I wanted to keep it simple, passive, and as light as possible. The tulip is light, but has a tendency to tear a little (it’s about Alder weight, but can behave a bit like Mahogany without the grain complexity in that respect).

Lastly, he’s decided on a particular paint job (decidedly not very 51 P) and doesn’t want any plastic on the face. To make it easier to play, I have turned the pickups in the opposite direction to the normal – so he can put his thumb on the pickup without one half getting in his way.

We started on Monday, taking a trip out to get some maple. Youngest has bored himself rigid sanding the body (which at least got him doing something constructive!)

IMG_20170812_094026[1]

I let him use the power sander. But after cutting the body out this morning, he took most of the flatspots from the bandsaw out with a rubberised block and some sandpaper. He didn’t complain very much. I got a couple of solid hours work out of him, so that’s one objective met!

So by the end of the first week (and not necessarily the most full on week in the workshop), we have a neck block with a glued fretboard and a body fully sanded and ready to be sealed and painted.

Next up is sealing that body – which is really important because Tulip is a bit of a sponge for finish on the end grain! While that’s drying I’ll be carving the neck shape and slotting the fretboard.

I might have to get back to building this winter…

Prototypes – Would you like to own a bargain guitar?

Hi folks.

There’s been a long silence from me on the blog as I’ve found it hard to find the time to write at all recently. Although I’ve been quiet on here and on Social Media, work has continued on a number of projects across the winter with some more guitars going to custom design customers.

At this point, there’s a few guitars in the house…..actually quite a few. Some are part of my collection from the ’90s and early 00s – and some are prototypes that I kept because I became attached to them.

However, it’s become clear that they cannot continue to pile up as I build experimental models – I simply don’t have the time to play them or the space to store them. So I’m going to refurbish them and market them to you at some pretty remarkable prices for a hand built instrument.

First up though is a brand new build this year: the Sapele Viola:

Excuse the video rendering quality, but the idea was to get the best sound, not picture.

The original idea behind building this guitar was to use reclaimed  wood and the best of the ‘non branded’ parts available. That didn’t go totally according to plan as I used branded Pickups and Wilkinson hardware. But all in all the budget was kept manageable because the wood was sourced from offcuts at my local hardware store.

So the long and short of it is that the parts for the guitars cost about £300 to bring in. I had finish and sundries in stock so I won’t count those. The guitar then took about 60-70 hours of work (which even at the minimum wage of £7.50 p/h equates to £450 – 525, and you can’t get even a reasonable chippy to fit a door frame for less than £30 an hour these days). It’s in a hard case which cost another £70.

So I looked at all that together, and at the lowest labour price, the guitar should be around the £720-795 mark to just break even on it.

So here’s the bargain:

I’m accepting any sensible offer for this guitar around the £550 mark – which is what roughly it’s going to cost me to renew the heating in the workshop so that I don’t half freeze to death this winter!


This is an entirely hand built guitar, mostly with non powered hand tools, and there is (and will only be) one of these guitars as it was a purely experimental build to try a range of parts and techniques all in one project. The video above shows the success of the idea, it sounds absolutely wonderful despite my rusty playing.

It has Wilkinson Hardware, Alnico 2 Humbuckers and is made almost entirely from Sapele and Ebony, including the control covers. The truss rod is BiFlex, frets are Dunlop and jumbo, dots MOP, nut is bone. It’s a set neck construction with a scalloped heel for ease of access to the top frets. The scale length is 24.5″ – the neck is a full C/D shape but plays incredibly fast with the 12″ radius. Switchcraft jack and Switch for reliability, Japanese Pots and strap locks. It weighs about as much as a solid body Les Paul (not one of the modern chambered jobs).


So contact me through the normal channels  to come and have a look at it and play it. It will be very much first come first served for this absolutely unique bargain of a guitar.

All the Best

Tony


Building to a cost – is Sapele an answer?

Wandering around my local hardware store, I happened across a few off cuts of Sapele in early December. I had just built myself a guitar with which I had planned to start playing live again, but one of my customers had taken a shine to it so I let it go. So it seemed an opportunity. Could I turn cheap offcuts into a gigging instrument?

Brian May famously made his own guitar from reclaimed wood, I wasn’t thinking of quite so grand a project. But a good instrument on a budget, why not. It would prove once and for all that much of what we sell as luthiers is about the quality of the work, not just expensive parts.

The Wood

Here are the off cuts.

I went to put them through the planer/thicknesser. Unfortunately, the cold had got to it and it developed a fault. So another challenge presented itself.

Planing Sapele

Sapele presents complex grain. Planing it therefore becomes problematic, because the ribbons flow in opposing directions. Often, one way to approach thicknessing or removing cups from it is to use a gouging plane blade, across the grain at positive and then negative 45% angle. The gouging plane can be made cheaply by using a cheap and nasty plane, and rounding the end of the blade. I took a little depth this way from both halves of the body and then went to the smoothing plane to prepare the back. (The front is going to be carved).

The smoothing plane has to be used in the best direction possible – it will dig in if you work against the grain, but the complex grain causes some tear out. To reduce this, the edges of the smoothing plane are rounded slightly, the blade sharpened to a fine polish, and the depth of cut is set to the shallowest useful point. There is still a little tear out, so sanding had to be rigorous.

Jointing the two parts of the body is done by the usual method. The two pieces are placed faces together in the vice, and the joint surfaces are squared with the plane, and tested for straightness with steel edge.

The two halves are joined together in sash clamps, but I have seen joints like this made without clamping at all – either bound or held between bench dogs. It’s not going to under much strain.

Making the Neck

Taking the solid block, it’s clear that the headstock is not going to be very wide. The block had to be squared up, so that the truss rod could be laid in. That’s done with a router, a domestic use 1/4″ one rather than anything more industrial, and a 9mm bit. The rod, a biflex twin part one, is designed here to sit under the fretboard alone – the access to it is carved in to the headstock with a gouge.

img_20161222_184038

The reason for squaring up in two directions is to put the headstock through the bandsaw and get a vertical cut. (Of course this could be cut with a sharp handsaw).  This is then planed back with the No5 Jack plane and a hole drilled through to the truss rod with a had drill.

The Fretboard. This was a piece I had to order in, (at about £25) – it was a second grade Ebony blank (A grade, but not AAA grade!). That said, it was a good piece, and worked nicely. I marked the shape for the fretboard, cut slightly wide of it with the bandsaw, and then used the no5 plane to run a smooth edge back to the line on the Shuting board. The centre line was marked, and then it was stuck down to a block with double sided tape and that block held down to the bench between the dogs. The rough radius was put into the fretboard with the plane. Then it’s removed and the frets marked and sawed.

The neck is still a solid block, with the headstock angle in the top. The Fretboard is glued down to it with standard bench clamps creating plenty of pressure. I use a staple at each end, gunned into the sapele and then cut off to create a short spike, to stop the ebony moving about under the clamping pressure.

Dots are then drilled into the fretboard with a 6mm drill bit, then the fretboard is sanded, carefully checking that the radius and straightness along the length is maintained. Then the neck is cut roughly to size, and the plane used to square up the heel at its full depth.

The Body

img_20161213_171728

The body block wasn’t wide enough for a normal ‘Les Paul/Strat style shape, so I designed this around a cross between the  Gibson EB-1 Bass made famous by Jack Bruce, and the classic Les Paul shape. I measured up, cut a the shape from my template on the bandsaw, and routed my pickup shapes in based on the middle line I had marked.

Then the neck joint, had to be routed, but the neck is going to go in at a slight angle. So to achieve this, the neck is lined up on the body so the end of the fretboard is in the right place, and two straight pieces are put up against it and clamped. With the neck removed, the joint can be routed to about 3/4 of the depth necessary.

Then the neck joint pitch had to be calculated to raise the strings over the bridge – which is clear from the drawings (always have detailed drawings). This is put in with a hand plane up to the back of the neck pickup to the end of the body, all the way across the guitar. Now the router was returned to the body and the full depth route completed, using the previous edges as a guide.

Then the rest of the body can be carved down. The level edge is marked all around the side, and then the shape is carved down to the edge with a wide gouge. The bridge is the highest point on the body. I used a finger plane to smooth out my marks, then a lot of sanding!

The routing holes for wires have to be made before the neck is glued in – if you forget, you’re in big trouble!

Back to the neck.

Now it can be shaped, the headstock cut out and the volute cut. I made up a pine block to clamp it to to shape the back of the neck.

img_20170105_141336


The shape was cut with two rasps, but the heel at this stage is left unformed, though cut close to the marked line. This is because its going to be blended into the body. At this point, I drilled the tuner holes and fretted the neck.

The neck was then glued into the body.

Finishing Up

It’s time to drill for hardware, open up the electronics bay, and make a cover for it. I drilled through to the outer edge for the jack socket, and made a template to cut the back plate hollow.

The next stage is sealing up the wood ready for spraying. I used Z-Poxy – but in the very low temperatures of an English winter it takes a while to go off and it’s a messy job. I spread it onto the wood and scrape off the excess, just leaving it filling the grain. But there are other ways – for furniture I often use Shellac and sawdust by rubbing in the shellac with 320 grit paper. The problem it that this will shrink back, so it will tend to allow the finish to sink a little – an interesting effect for ageing the guitar.

Once dry, it was sanded back, and the guitar taped  up and hung for Spraying with Nitro. I have a gun and compressor set up, but you can still buy Nitro in cans from luthier supplies, or more easily from your local car paint store (as they often stock clear Lacquer for restoring old cars, and there are plenty of classic auto clubs still in the UK). The joy of Nitro is that its easy to use. Just spray on lightly and leave, lots of thin coats. If it runs, wait til it’s dry, sand back and do it again. At the end, wait for a week until its nice and gassed off, and flatten any surface with 1200 – 2000 grit wet and dry. T Cut is a great polish (and probably in your garage anyway) for blemishes too. Then its all about elbow grease if you’re buffing by hand.

So then its assembly and set up left to do, cutting a nut and stringing it up.

Here’s the Result:


So is it any good, and Sapele a good answer to the price of mahogany? Well it’s half an answer. It’s often very heavy, the grain is complex and can be hard to work. But if you pick your pieces carefully, and don’t build heavy deep bodies, then it works fairly well. The grain can be very striking, and it doesn’t need to be stained or coloured unless you really want to. The more dense it is, the less it tends to soften the attack of the string, so Sapele can give a similar bright strike sound to a maple cap on a Les Paul.

I  like my cheap guitar, I’ve already taken it out and used it at a rehearsal and it performed very well.

Despite the low cost (though well chosen) hardware and pickups, the performance is very good. It does prove that much of what makes a good guitar is in the way that it’s constructed and the care taken over the craftsmanship. So even if you’re having a guitar made by hand by a luthier, it’s not always necessary to use particularly exotic woods – if the materials are stable then it’s possible to make a working guitar from them.

And then there’s the whole debate about ‘ToneWood’…..I’ll let you argue that amongst yourselves!


A New Prototype

For the last month I’ve been working on both a prototype and updating my methods for making modular instruments, in an attempt to streamline the process.

When building a modular instrument, the production process should be such that every neck and body should fit each other – that way the customer can choose from any number of combinations (and I can keep a few different bodies and necks in stock). So for example, I could have a few bodies made of Alder, sealed and ready for painting, and a few neck blocks (necks part finished with a different fretboard materials, ready for hand shaping to taste). This way, the customer gets a shorter turnaround, but still gets a guitar built to the general design, but with a neck shaped to their own hand, with whatever frets they want, whatever fret markers they want, whatever colour they want. But I’m still slightly ahead of the game. I can even make special orders from exotic woods, but having accurate templating will still make the process quicker.

When you’re making guitars, or any other product, the price that you need to charge the customer relies on two things: Raw Materials costs, and productivity. In guitar making, I have absolutely no control over the cost of parts – there simply aren’t any deals to be had, the price is the price and I’m stuck with that. But what I can do is raise productivity, and therefore reduce prices to the customer. This is where I have to compete against those companies who can cut by machine. I still have to do all my cutting by hand, CNC is out of my reach, and just not my bag. By grouping actions of a similar nature, the fact that I don’t have a lot of workshop space can be made less of a disadvantage. Making bodies for a few days, then necks, then scratchplates.

That doesn’t mean that I want to stop making bespoke instruments, but that if I know I can diversify a little, I can invest more into the workshop – and hopefully reach the next necessary step – rebuilding the bloody thing to keep out the damp, cold and rodents!

The new model:

img_20161124_0850541

The aim was to create a new and unique shape, but one that would support a huge number of possible configurations for pickups, switching and hardware. Also, I set myself the task of making a guitar that would stand up against the amp without the risk of falling over – it had to have two points of contact with the ground.

The prototype had to be one that was a real utility instrument, so I went for a two humbucker guitar, with coil taps and a tremolo. Because I’m going to be playing it, the tremolo only goes one way, something achieved by cutting the neck pocket a few millimetres deeper than the design would normally require.

The basic design revolves around the 25 1/2″ scale length. There are a few reasons for this. The first is that because of the raised tension in this longer scale, the range of tones available is slightly wider. Listen to the neck pickup on a strat – it’s not the materials alone that allow that ‘chime’ and attack – the tension changes the way that the string reacts. Of course, top end can always be rolled away with the tone pot. Putting a single coil in a 24 3/4″ scale guitar rarely gives  a similar effect in terms of tone, there is a noticeable lack of that spank and attack. In this case I originally started with a piece of Ebony for the neck, but it had a fault in it and I had to scrap it, hence the maple. However, the extra attack that seems to generate has made the guitar even more reactive, especially for the neck pickup.

The other thing that really changes massively in the tighter string is he reaction to both pinch and natural harmonics. For me, in the 25 1/5″ scale they are often more prominent and certainly pick harmonics seem easier to coax out of the guitar. Note that many of the late 80’s shredders used Strat length guitars. Lastly, the increased tension I think, aids tremolo stability – more string tension balanced by more spring tension. All together there is more force seating the block against the pins.

The wood used for this was leftovers. The piece of Tulip wood that was used for the body was brought in as a long plank, but the end was a bit green so I left it to one side – so that was cut and glued into a blank. The maple for the neck was a leftover that had warped slightly, so I had put it to one side earlier this year, but managed to plane it straight enough to use. The fretboard was was the last piece of a block I’d already made two necks from, both of which had subsequently warped and had to be binned, but for a fretboard was still fine.

I didn’t worry too much about the colour scheme, on the basis that I had a large piece of black scratchplate – so the body had to work with that. White seemed the obvious choice, so a spray can was purchased.

The neck shape is a little faster than I would normally design for myself, it’s a bit flatter too. When I first set it up and plugged it into an amp, I didn’t like the action because it was too low!

Lastly, the pickups. I’m a massive fan of the Bare Knuckles Pickups – my go to has always been the Mules. However, for prototyping they are a reassuringly expensive. So as an experiment I ordered a set of ‘Rolling Mill’ pickups from Iron Gear. Are they as good as the Mules? For me, no not really. But at three times the price are the Mules three times as good, absolutely not? The difference is subtle, partly in the smoothness of the bottom end of the pickup. But there’s no doubt that what Iron gear have done is create a pickup that at this price point I haven’t seen matched. They stand up against pretty much any of the non boutique brands that I’ve used here for replacement work, and destroy anything else I’ve heard that still resides in the budget market.

The prototype took about a month to make, from the templates to the finished guitar, which is pretty quick for me. I did a lot of re-tooling, especially in terms of the router and table. Whatever happens that will be of benefit later. In design terms, it’s certainly a departure from the more traditional shapes that I have tended towards, let me know what you think of it. I’m not sure whether it will prove popular, but it’s certainly growing on me!

PS: It doesn’t have a name yet. I think it’s going to need one.

PPS – As an alternative, I could also make a ‘custom’ model using exotic woods and load the guitar from the back, using the same basic shape and neck design – no plastic at all.